Photoshop has the ability to do some very interesting things with layers. Nowt it’s time to learn something a bit more about layers and what you can do with them. In this tutorial I’ll cover some advanced tips and tricks on Layers. I’m sure these tips will broaden your Photoshop knowledge and will be the next small step towards better images. Let’s get started.
Blending Options in Photoshop
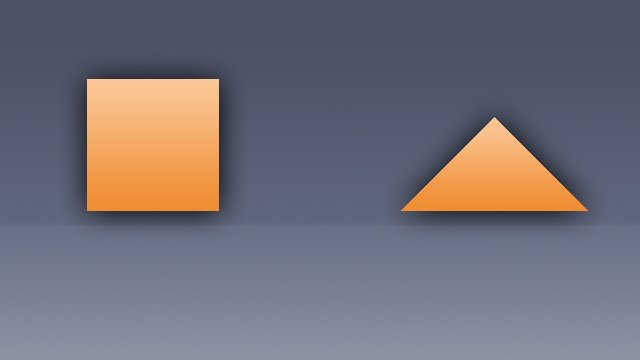
A way to tweak the layers you created is by using Blending Options. I will be using the following image to demonstrate blending options.
I have the triangle, square and background on their own separate layers.
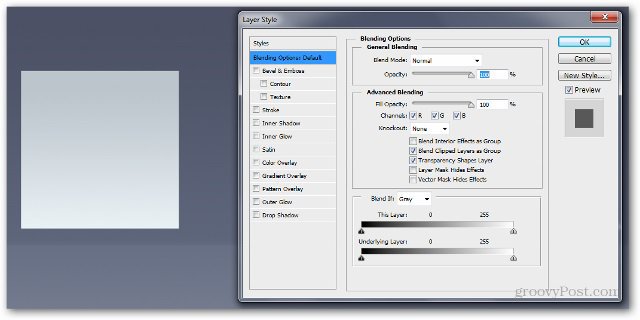
You can access the Blending Options for each layer by right clicking on it and selecting Blending Options at the top of the context menu.
The Layer Style Window will appear. From here you have a variety of effects to choose from. Some I like are Outer Glow, Gradient Overlay, Bevel and Emboss, Stroke and so on.
We’ll start by adding a Drop Shadow. In CS6 and newer versions, this is located at the bottom, while in earlier versions it’s at the top. My settings are: Blend More – Normal Opacity – 100% Angle – 110 degrees Distance – 5 px Spread – 0 px Size – 100 px Notice how the image changes dynamically while you move the sliders.
Now let’s try a Gradient Overlay. You can make your own gradient or chose from one of the provided ones. Here are my settings: Blend Mode: Normal Opacity – 100% Gradient: #ef8d31 to #fac696
After pressing OK, you will see a small fx indicator at the right of your layer. All the effects you used for the layer will be displayed at the bottom of it, under an Effects box.
You can also copy the exact same effects from one layer to another by holding Alt and dragging the Effects box to the desired layer.
You can see the same Effects box will appear under the second layer…
…and changing the image too:
In Short
Blending Options and Layer Effects come in handy in many Photoshop scenarios. They are a basic-to-intermediate technique for improving your images and you’ll most likely find yourself using them quite often.
Opacity and Fill
To demonstrate the Opacity and Fill sliders and the difference between them, I will be using this image:
Again, I have the Circle and Background separated in two different layers. I’ll directly apply a Drop Shadow effect to the Circle layer.
Now, let’s try decreasing the Opacity slider to 50%. You can see that the entire layer, along with it’s shadow effect will become slightly transparent.
Now, bringing the Opacity back to 100%, let’s try decreasing the Fill. Notice how this time, the shadow stays fully opaque and the slider isn’t altering the layer effects.
Logically, if we bring it down to 0%, the only thing left would be the shadow.
In Short
The Opacity and Fill slider are as different as they are similar. The best way to get used to them and to figure out which one does what is to play with them by yourself and figure out which one you prefer for which situation.
Adjustment Layers (CS3 and newer)
Now I’ll give you a quick introduction to Adjustment Layers. Although you’ve probably seen me use them in previous tutorials, they are still worth a quick explanation. This is the image which I will be using. It’s just one single flat layer, so this time you can actually download it and use it.
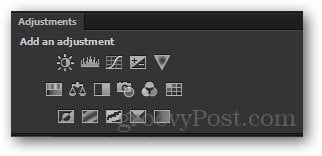
The adjustment layers can be accessed from the Adjustments Panel. If you don’t see it near you, going to Window > Adjustments will enable it. There are a variety of different adjustments you can chose from, and all of them serve a similar purpose to the options from Image > Adjustments.
Today I will show you the Hue/Saturation adjustment layer. I will begin by clicking on its icon.
Notice the newly appeared layer and the Properties for it that appear instantly. You can edit the properties to achieve the effect you wish to achieve. Not all adjustment layers have edible properties, but the ones that do usually need tweaking before they can do what you want them to.
And here is the effect on the image:
From here on you can go crazy and do whatever edits you wish to your image…
… but as long as you keep your adjustment layer intact, you can always go back to it at any point during your work and double click on its thumbnail…
… and completely reconfigure the adjustment completely.
In Short
The adjustment layers are probably one of my favorite features in Photoshop. They save tons of time and frustration and they are very easy to use. The more you get into Photoshop the more you will realist their true flexibly and power. Comment Name * Email *
Δ Save my name and email and send me emails as new comments are made to this post.


