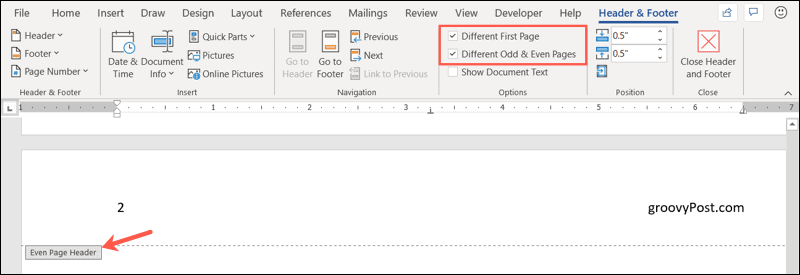
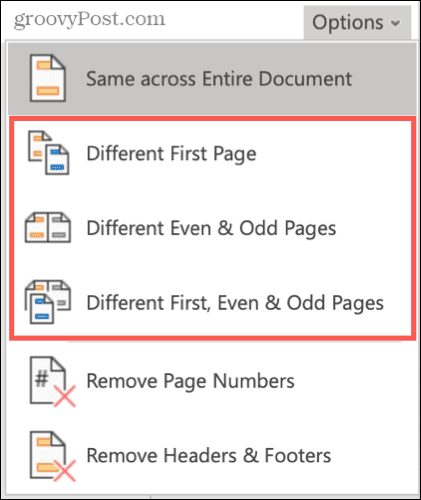
Maybe you want these areas to be slightly different in your document. You might want the page numbers to alternate left and right on every other page. Or you may have a cover page for the first page and don’t want to use a header or footer at all. The process is the same in Word on Windows and Mac, but a bit different in Word on the web. So, we’ll start with how to set up different headers and footers in your Word document on your desktop.
Headers and Footers in Word Desktop
Open your Word document on Windows or Mac and do the following to assign your headers and footers.
Click Close Header & Footer on the right side of the ribbon or double-click in the document body to return to your document editing. You can see your headers and footers in your document while you work on it. They simply appear dimmed.
Headers and Footers in Word on the Web
Sign in to your Microsoft account in Word on the web and open your document. Then, follow these steps to insert your headers and footers.
Click inside the gray area of the page when you finish and want to resume working on the body of your document.
View Your Headers and Footers in Word Online
Once you go back to editing your document, you won’t see the headers and footers. This gives you a focused view of your document body. If you’d like to see your document with the headers and footers, go to the View tab and click Reading View.
You can then view your document’s headers and footers. To exit Reading View, click Edit Document > Edit and you’ll return to the main editing screen.
Make Use of Those Headers and Footers in Word
Whatever you find most helpful in your headers and footers, take advantage of the handy feature. And remember that you have flexibility, like using different ones in the same Word document. For related Microsoft Word how-tos, check out how to work with page numbers or how to insert footnotes and endnotes. Comment Name * Email *
Δ Save my name and email and send me emails as new comments are made to this post.
![]()


