How To Display File Extensions In Windows 7
- Right-Click the Start Orb, and then Click Open Windows Explorer.
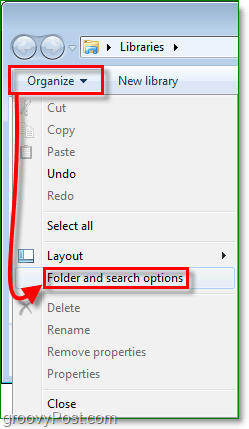
2. In Explorer, Click Organize. Then Click Folder and search options.
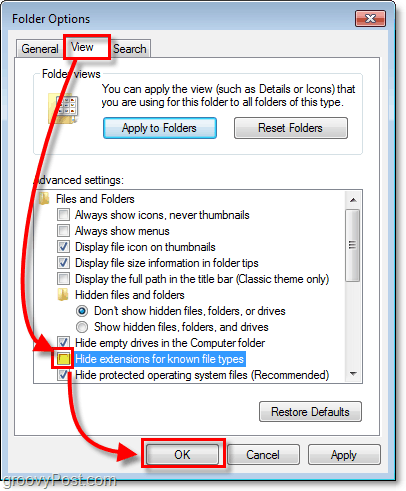
3. In the Folder Options window, Click the View tab. Next Click and Uncheck the Hide extensions for known file types check box. Click OK to finish.
All done! Instantly your files will show their extensions at the end of their file name. Now you can even use the Right-Click > Rename feature to change file extensions manually as well (just make sure you know what you’re doing first.)
Speaking of customizing Windows 7, take a look at this How-To for enabling Check Boxes to Select Folders and Files in Windows 7. Honestly I think not showing extensions is fine in mist cases however if your a geek and need to make a change or edit something, showing file extension is a must yeah. I am having the exact same problem. I have a month old Dell XPS 8300, win7 Home premium. Whenever I change folder options (deselect) hide known file extensions, click apply and ok, it allows me to see file extensions. But, when I reboot, the hide known file extensions box is selected again – aargh. I have gone into the registry and made the suggested changes (change from 0 to 1), etc., to no avail Any new fixes? Other web sites say, basically, the same thing, “Click on the ‘My Computer’ icon …” There is NO “My Computer” icon on my desktop! Your approach was more direct and should satisfy everyone’s problem with this issue. Maybe I forgot to say … THANK YOU! thanXXXXXXXXXXXXXXXXXXXXXXXXXXXXXXXXXXXXXXXXXXXXXX Comment Name * Email *
Δ Save my name and email and send me emails as new comments are made to this post.


![]()
