Adobe Photoshop Layers for CS5 : Screencast
Adobe Photoshop Layers for CS5 : Screenshot Review
What is a layer?
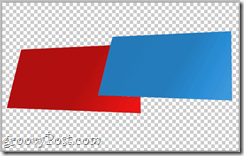
Think of a layer as an object or image separated into its own personal space. To give you a quick demo of this, let’s say you have two sheets of paper – a red and blue one. You can have them each side by side on the same workspace (image) and you can also have them overlap. Well if those two sheets of paper were in Photoshop, their layers would look like this…
…and the image would be something like this:
But what if we were to get these to be on top of one another? Let’s grab the red layer and move it over the blue one.
OK, cool! But what if I wanted the blue sheet to be on top of the red one? Well, let’s grab the layer of the blue sheet and drag it on top of the red one.
And just like that the blue sheet of paper is now on top of the red one.
In short: Layers separate different objects on you Photoshop Canvas from each other and, allow you to choose which items is layered on top of the others.
How can I create a Layer?
Creating a layer is an incredibly simple process. You can either go to the layers panel and click the Create new layer icon…
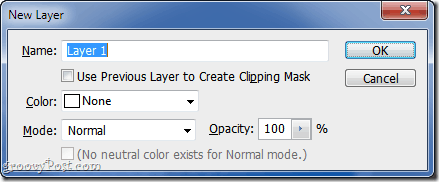
…or press Shift+Ctrl+N on your keyboard to get into some more advanced options.
You can rename your layer and you can create or paste in any object you want, but keep in mind that you need to create a new separate layer for every new object you want to drop on your canvas so you can control your canvas.
How can I group similar Layers together?
Photoshop professionals work on documents including 100+ layers so using just names really isn’t an option as things can get messy real quick. So to keep things nice and organized, Adobe thought of something called layer groups. They can be created by clicking the Create a new group icon on the layers panel…
… or by selecting the layers you want to group… …and pressing Ctrl+G.
Layer groups, just like layers, can be renamed to add additional tidiness in your documents and can also help you turn on or off multiple layers at once. Other than keeping things organized, they don’t really have much of a use other than that.
How can I blend in two backgrounds together using layers?
Perhaps the last most important thing for layers is their blending mode. Taking a look back at our image, when selecting the Blue layer, we can see its blending mode is set to Normal…
thus making the image look like this:
But if we were to change the blending mode (to Color for example)…
…we get a completely different type of image effect:
There are many different blending modes that help mixing objects that are stacked and that can also help create interesting image effects. Some of the most often used ones are Overlay, Hard Light, Subtract and Color, but you can play around and find out which ones work best for you.
Comment Name * Email *
Δ Save my name and email and send me emails as new comments are made to this post.


