In this article, we’ll look at four creative IFTTT Google Home automations to streamline the most important areas of your life.
IFTTT Made Creating Applets Harder
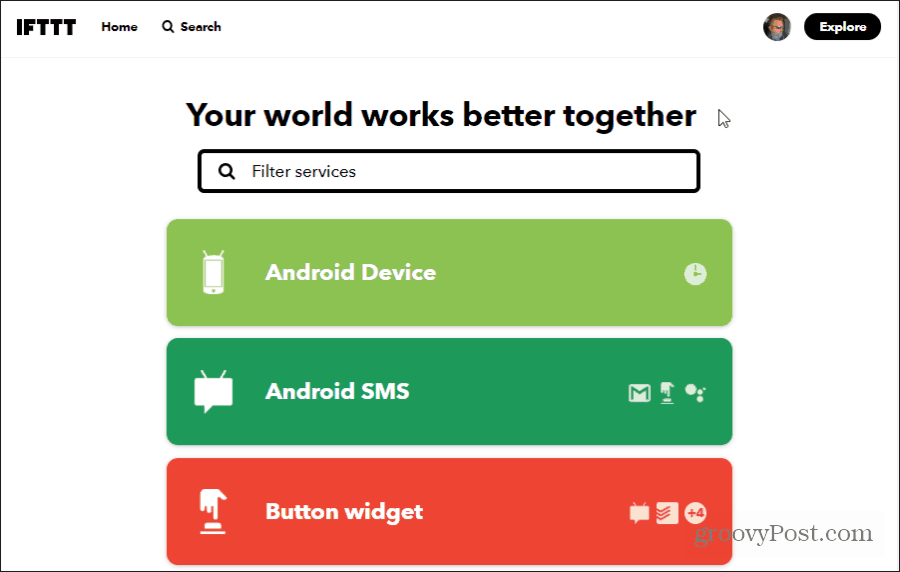
Before getting started, it’s important to know that making new automation applets on IFTTT is a little harder now. IFTTT remodeled its website so that it’s much more difficult to find where you can create your own applet. When you first visit IFTTT, you’ll notice you only have an option to explore existing applets other people have made. This option is the Explore button on the upper right of the main page.
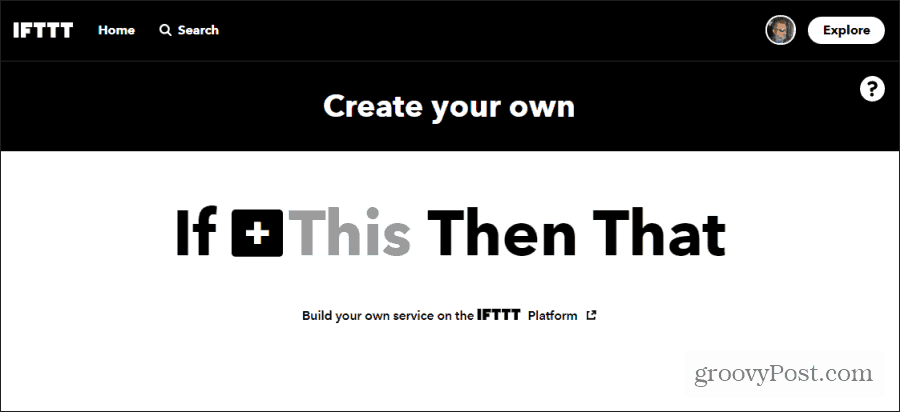
This could be to encourage people to use existing applets rather than create their own. Whatever the reason, you can still create your own applets from scratch. To do this, select Explore. Just under the Search field, you’ll see a very small + icon next to Make your own Applets from scratch in small print. Select that icon. This will bring up the usual applet builder page that IFTTT users are familiar with.
Now you’re ready to start building your IFTTT Google Home applets!
1. Add Items To Your Grocery List
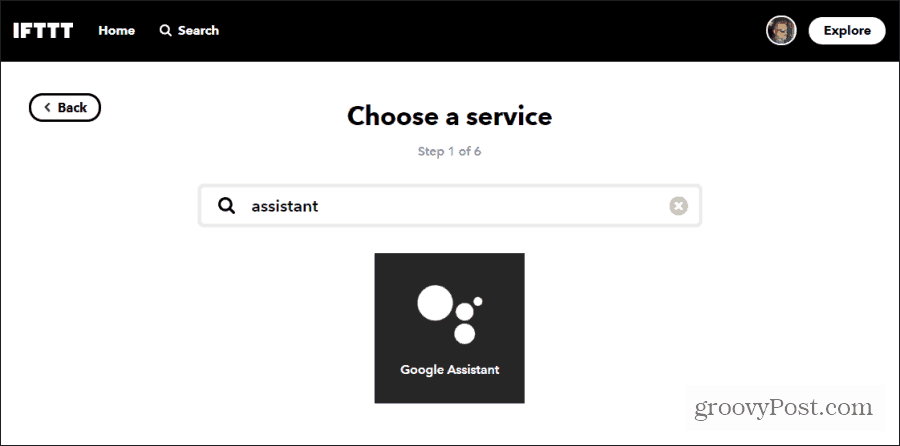
The hardest part about maintaining a running grocery list is that when you notice items you’ve run out of, you usually don’t have a pen or paper handy. Google Home can help by letting you add items to your grocery list with just your voice. To do this, make a new IFTTT applet as described above, and select This. On the “Choose a service” page, type Assistant and select Google Assistant.
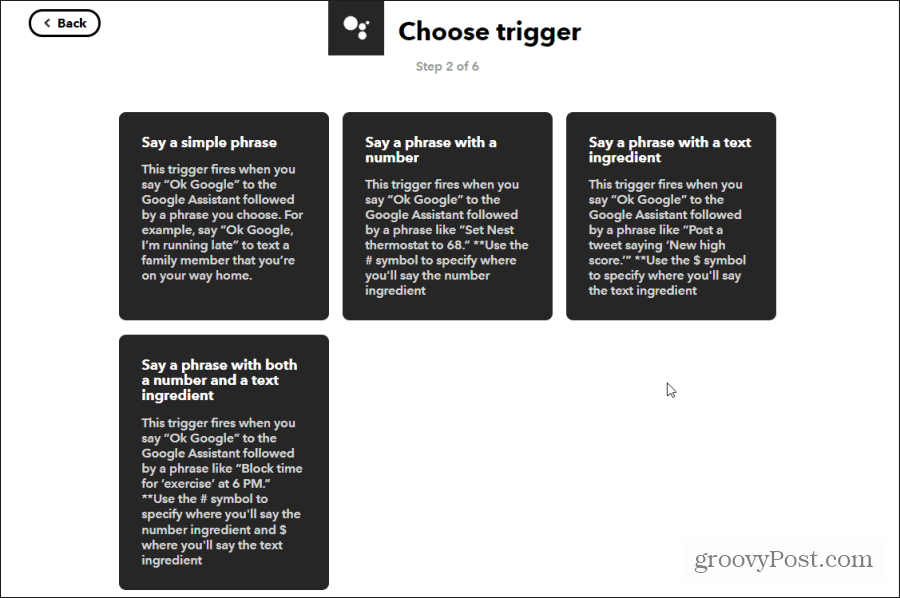
Why Google Assistant? Because Google Assistant is the service used by your Google Home smart devices to process your voice commands. To accept both the item and quantity you want to add to your grocery list, you’ll need to select Say a phrase with both a number and a text ingredient.
On the next window, you can type up to three alternative ways to say the grocery item command. You’ll also set up what your Google Home will say to you once the item is added.
Select Create trigger when you’re done. On the next screen, select the That link. In the search field, type the name of the app you use to store your grocery list. Options include:
EvernoteGoogle SheetsGoogle DocsNimbus NoteOneNote
Whichever app you choose, make sure you have an existing grocery list for Google Home to add items to. In this example, we’ll use Evernote. One of the Evernote options is Append to note.
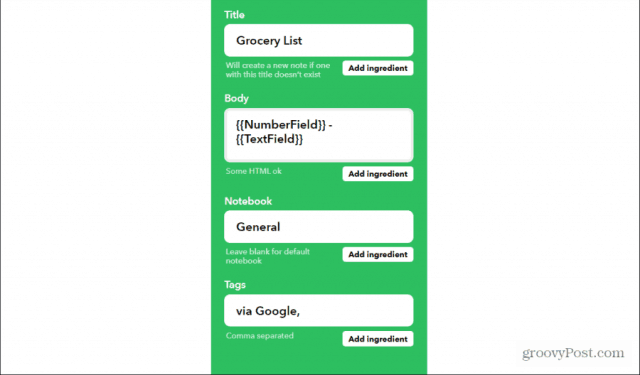
Make sure the Notebook and Title fields are typed exactly like your existing Notebook and Title of the grocery list in Evernote. Customize the body of the text to match how you list grocery list items in Evernote. When you’re done, select Create action and Finish.
Now you can add grocery items to your EverNote grocery list just by saying to Google Home: “Hey Google, add four eggs to my grocery list.”
2. Add Reminders To Your ToDo List
Running a household is difficult sometimes. It’s not always easy to remember everything you need to do. To simplify this, you can use your voice to add reminders to your favorite to-do app no matter where you are in your house. To do this, create another Google Assistant command using the same process as above. Choose: Say a phrase with both a number and a text ingredient. Enter the following items in each field:
What do you want to say?: Add todo item to $ at #What do you want the Assistant to say in response?: Your todo item has been added
You can also add alternative ways to say the command if you wish. Select Create trigger when you’re done. Select That, and choose your preferred todo app. Options include:
TodoistEvernote todo listGoogle CalendariOS CalendariOS RemindersMeisterTaskOneNote todo listRemember The Milk
In this example, we’ll use ToDoist. The only action available for ToDoist is Create task.
The best way to handle new tasks that you add by voice is to add those tasks to the Inbox and assign it for today at the time you’ve specified in the command. Use the TextField and NumberField ingredients from your voice command to customize the Task content. Select Create action and Finish when you’re done. Now you can add new tasks to your ToDoist account by saying to Google Home: “Hey Google, add a to-do item to take out the trash at 6 PM.”
3. Control Your Smart Home Devices
If you have one or more Google Home units and also have smart home devices, you’re wasting an opportunity by not connecting them. There are multiple ways to connect Google Assistant to your smart devices so you can control them. You can connect Google Assistant to things like your Roku and many other services. But one of the easiest ways to do this is using IFTTT. To do this, create another Google Assistant command using the same process as above. Choose Say a simple phrase. Enter the following items in each field:
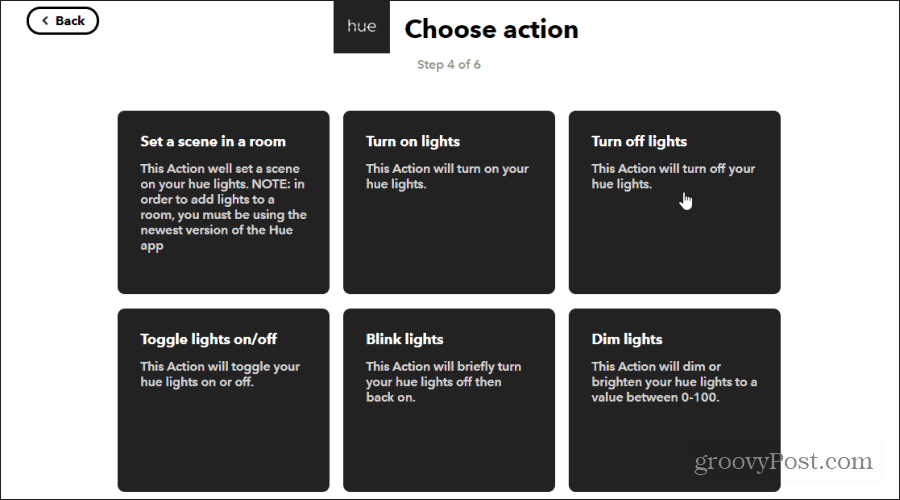
Select Create trigger to finish. Select the That link to move on to the action step. Choose the smart device that you want to control. In this example, we’ll select Philips Hue to turn on the Philips Hue lights on the first floor. If you haven’t connected the device to IFTTT before, select Connect and walk through the wizard to set up the service. Once you do, you’ll see all of the available actions for that smart device.
In this example, we’ll choose Turn on lights. Then, select either all the lights in the room or individual lamps.
Select Create action when you’re done. You can repeat the process above to turn off the lights, set scenes, dim the lights, and more. The actions available depend on which smart device you choose. IFTTT supports a long list of popular smart home devices.
4. Automate Your Home Based on Your Location
Have you ever left the house in the morning only to remember halfway to work that you forgot to turn off a heater, or the lights? You can remove this annoyance from your life by letting your location control your home environment. This is a variation of controlling smart home devices by using IFTTT to also incorporate using your Android phone as a trigger. To set this up, make a new IFTTT applet as described above, and select This. On the “Choose a service” page, type Android and select Android Device.
You’ll use the phone’s WiFi connection to your home’s Wii network to identify when you leave or arrive home. Select Disconnects from a specific WiFi network.
On the next window, type the name of your home WiFi network exactly as it appears in your list of available WiFi networks on your computer.
Select Create trigger when you’re done. Next, select the That link and choose the smart device you want to turn off when you leave home. This can be any smart device and any action.
Select the specific device you want to turn off and select Create action. Now, every time you leave home, that smart device will automatically turn off. In the example above, leaving home will turn off the lights. You can repeat this process to turn on the lights (or any other smart device) when you arrive home and your phone connects to the WiFi network. Also, consider triggering multiple actions with IFTTT. The examples above are just a few you can use to automate and simplify your home life using IFTTT. You can mix and match a lot of these do create entirely new, creative automations of your own.
![]()

